扫描 ExtrudeGeometry
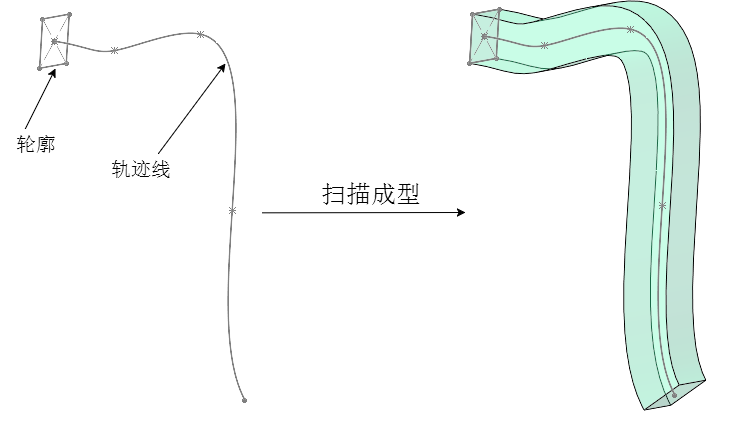
通过ExtrudeGeometry除了可以实现拉伸成型,也可以让平面轮廓Shape沿着曲线扫描成型。
下图是一个扫描变换案例。

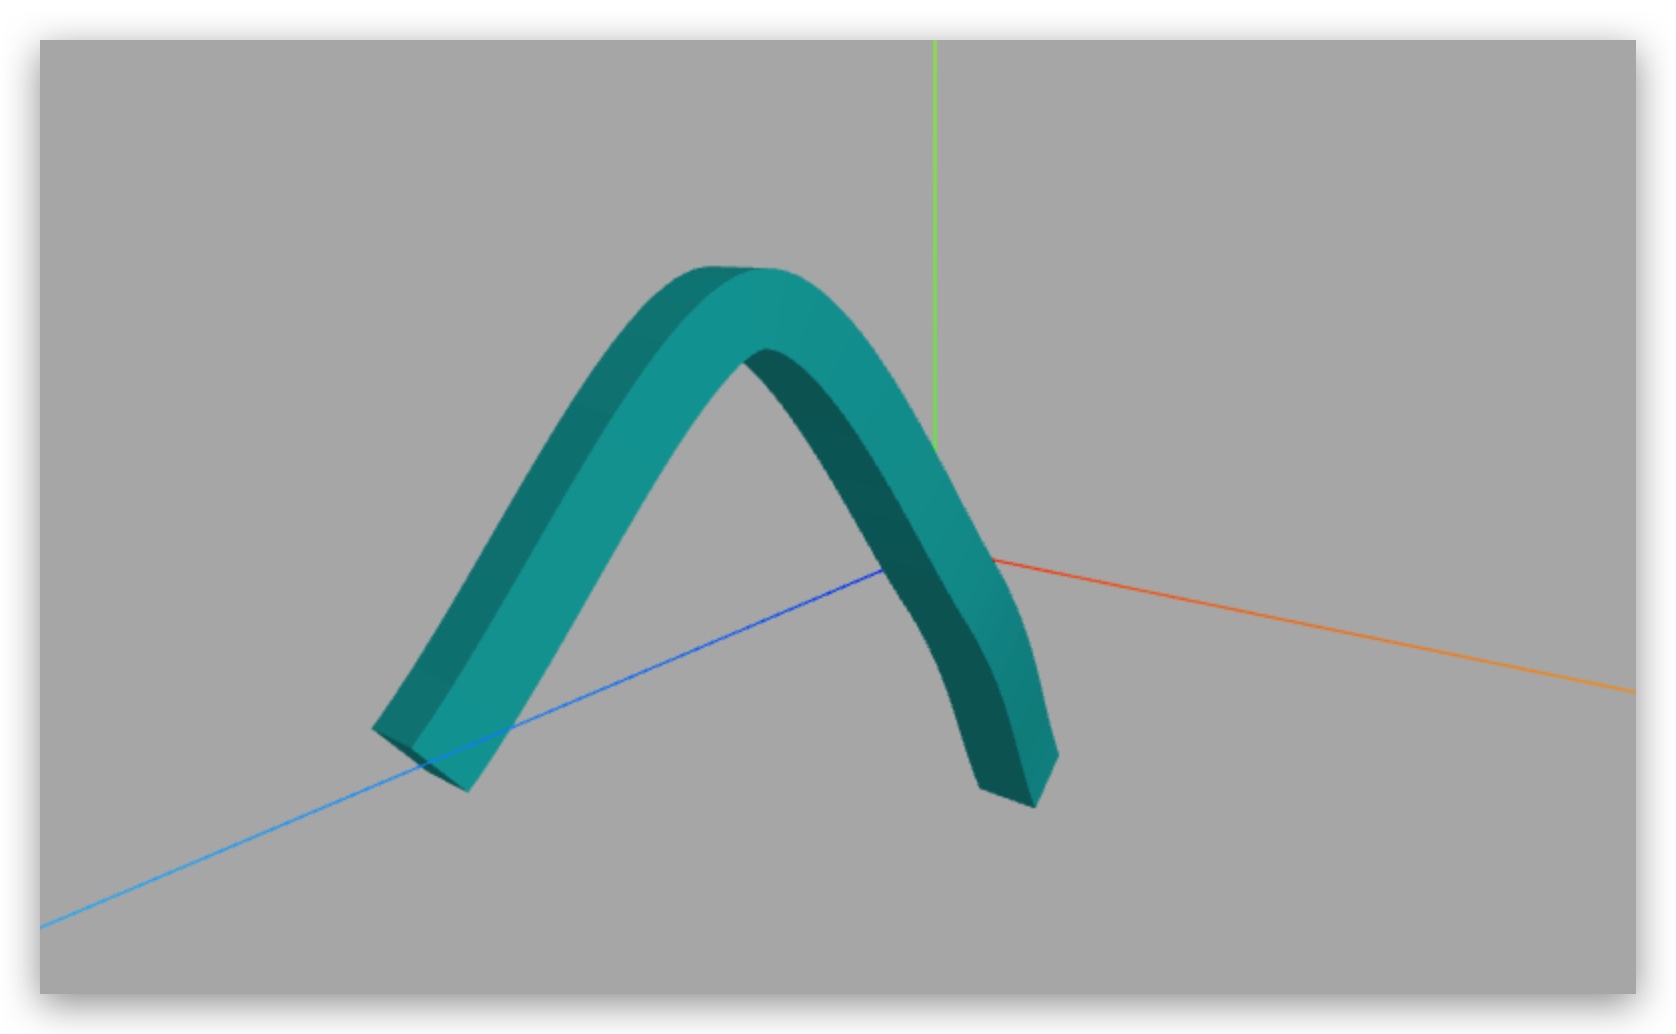
成品效果如下:

扫描轮廓
js
const pointArr = [
  // 按照特定顺序,依次书写多边形顶点坐标
  new THREE.Vector2(0, 0), // 多边形起点
  new THREE.Vector2(0, 10),
  new THREE.Vector2(10, 10),
  new THREE.Vector2(10, 0),
];
// 扫描轮廓:Shape 表示一个平面多边形轮廓
const shape = new THREE.Shape(pointArr);扫描轨迹
js
// 创建轮廓的扫描轨迹(3D样条曲线)
const pointList = [
  new THREE.Vector3(-10, -50, -50),
  new THREE.Vector3(10, 0, 0),
  new THREE.Vector3(8, 50, 50),
  new THREE.Vector3(-5, 0, 100),
];
// 3D样条曲线
const curve = new THREE.CatmullRomCurve3(pointList);扫描造型
js
const geometry = new THREE.ExtrudeGeometry(
  shape, // 扫描轮廓
  {
    extrudePath: curve, // 扫描轨迹
    steps: 100, // 沿着路径细分精度,越大越光滑
  }
);示例代码如下:
js
import * as THREE from "three";

const pointArr = [
  // 按照特定顺序,依次书写多边形顶点坐标
  new THREE.Vector2(0, 0), //多边形起点
  new THREE.Vector2(0, 10),
  new THREE.Vector2(10, 10),
  new THREE.Vector2(10, 0),
];

const shape = new THREE.Shape(pointArr);

// 扫描轨迹:创建轮廓的扫描轨迹(3D样条曲线)
const pointList = [
  new THREE.Vector3(-10, -50, -50),
  new THREE.Vector3(10, 0, 0),
  new THREE.Vector3(8, 50, 50),
  new THREE.Vector3(-5, 0, 100),
];
const curve = new THREE.CatmullRomCurve3(pointList);

const geometry = new THREE.ExtrudeGeometry(shape, {
  extrudePath: curve, // 扫描轨迹
  steps: 100, // 沿着路径细分精度,越大越光滑
});

const materal = new THREE.MeshLambertMaterial({
  color: 0x00ffff,
});

const mesh = new THREE.Mesh(geometry, materal);

export default mesh;